Over the last couple of years, with the help of Synology, I have been able to secure a DS920+ along with a DX517 expansion & a DS923+ NAS unit, which I have written reviews about. Fast forward to 2025, and I was again in touch with Steph Clayton at Synology, who graciously helped me secure a DS925+ NAS for testing and blogging.
The DS925+ is the latest version in the 9xx line of Synology NAS products, featuring several new enhancements, including an updated CPU based on the AMD Ryzen V1500B, a 4-core processor. The unit also supports up to 32GB of RAM, Dual 2.5GB networking, and NVME drives for caching.
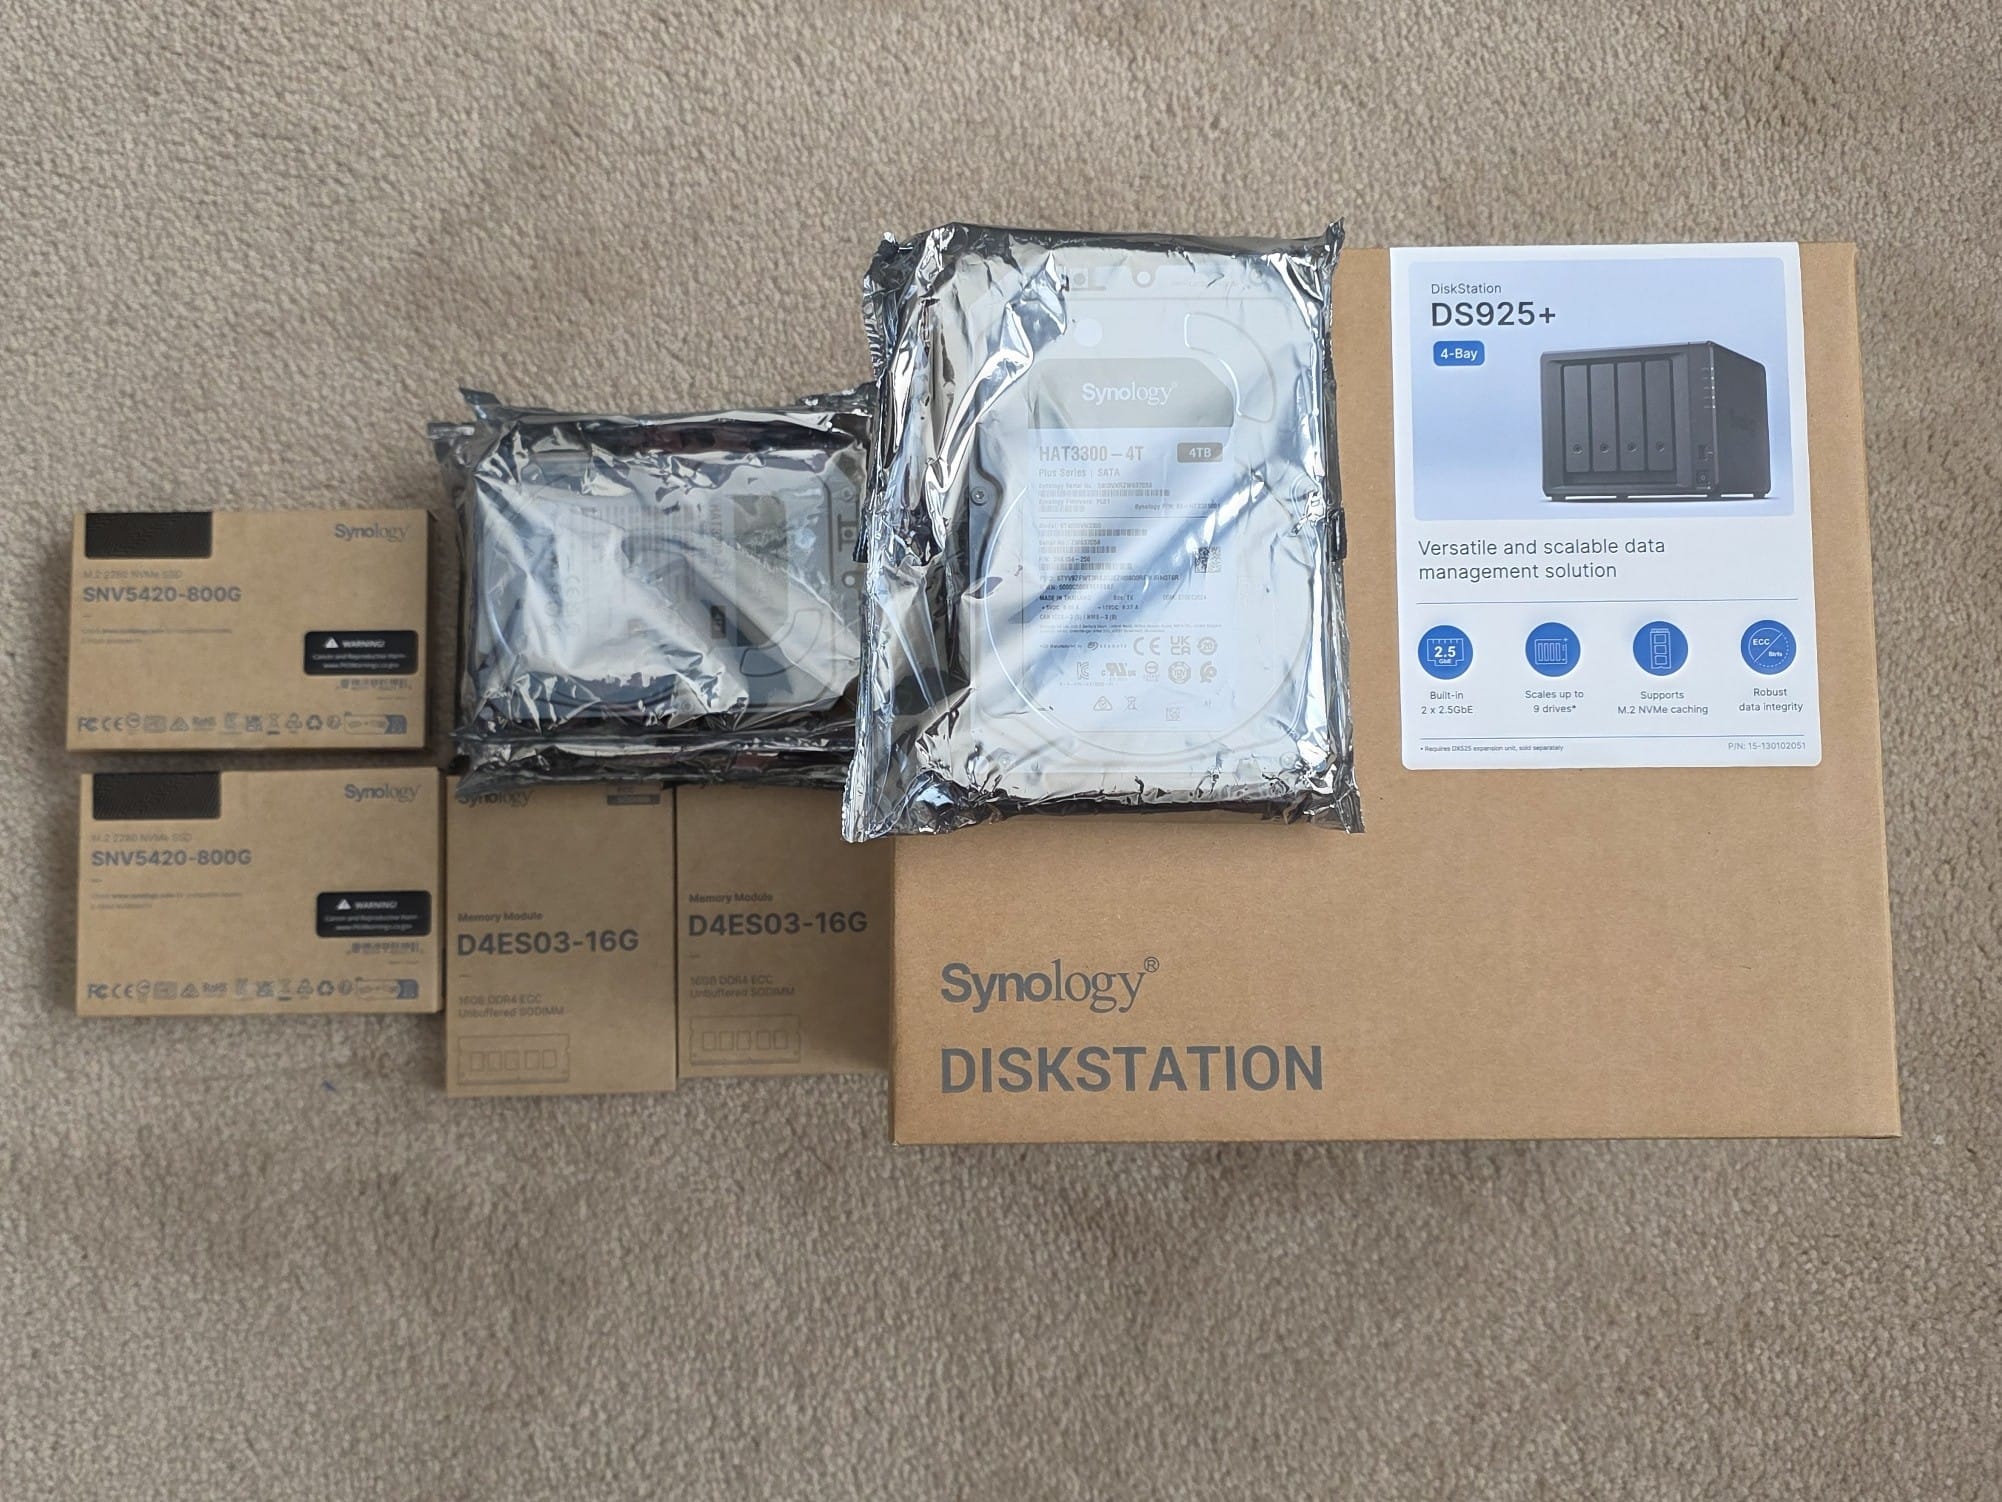
The following is a list of things my unit was installed with -
- 32GB of RAM
- 2 x 2.5GB network card option - bonding comes in handy here
- 4 - 4TB Synology HDDs
- 2 - 800GB NVME SSD drives for Cache
Here is the unit packaging once I opened the box -
The unboxing was complete, and now it was time to install all the components into the unit to prepare it for configuration - “Avengers Assemble.”
So the first install was the 2 x 16GB RAM sticks as you need the drive caddies out of the unit. Next, I installed the two 800GB NVMe SSD drives, which will be used for the cache at the bottom of the unit. Finally, the 4TB drives (4) were installed in the drive caddies.
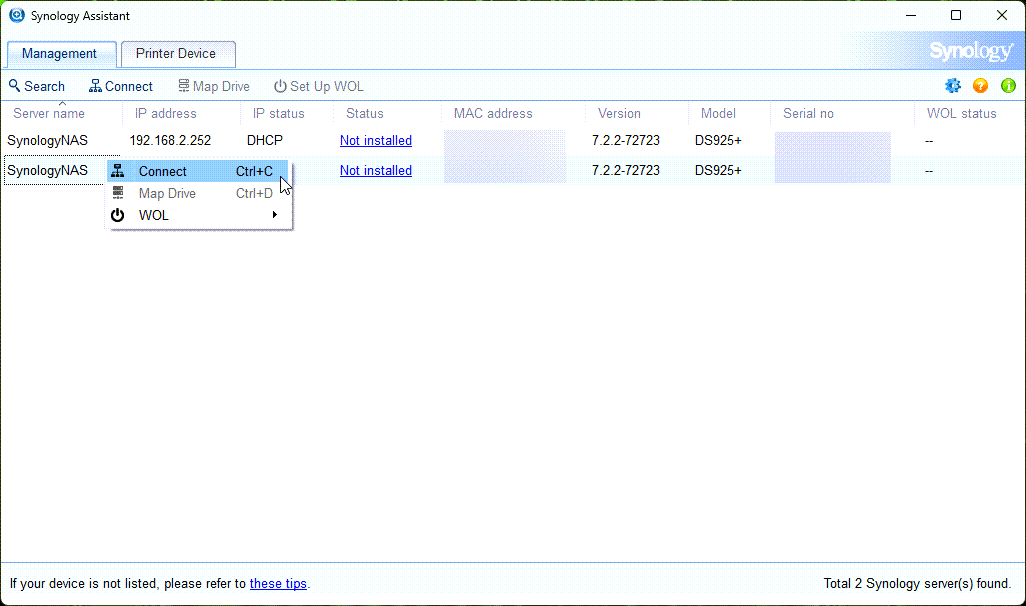
Next, I connected the power and the network cables to the 2.5GB cards and powered the unit on. I used the Synology Assistant tool that finds NAS devices on your network. Voila! The device showed up in the Synology Assistant application right away -
So I clicked the Connect link, which opened my web browser showing me my new NAS and that it was ready for setup -
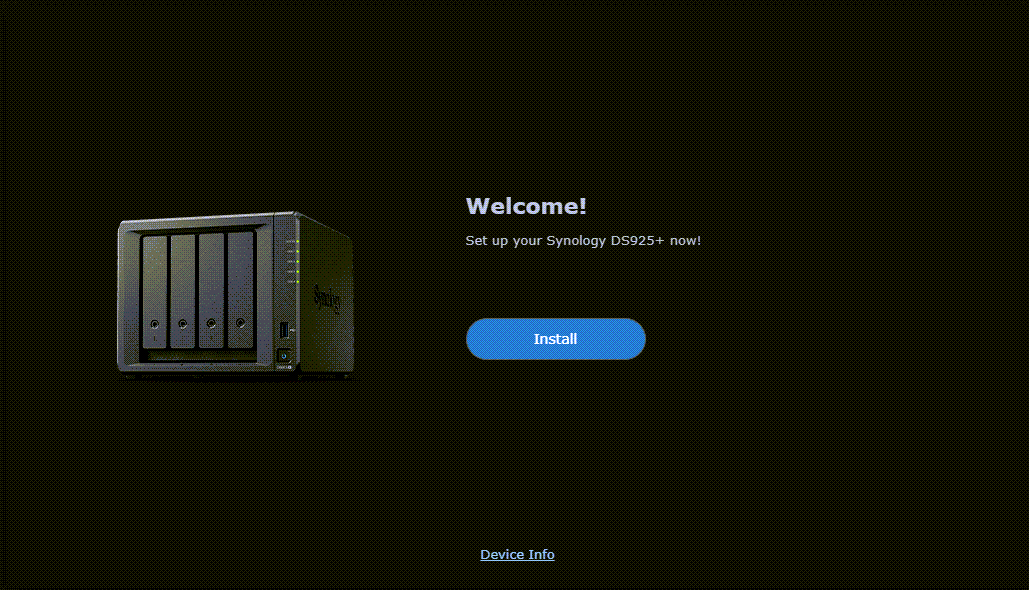
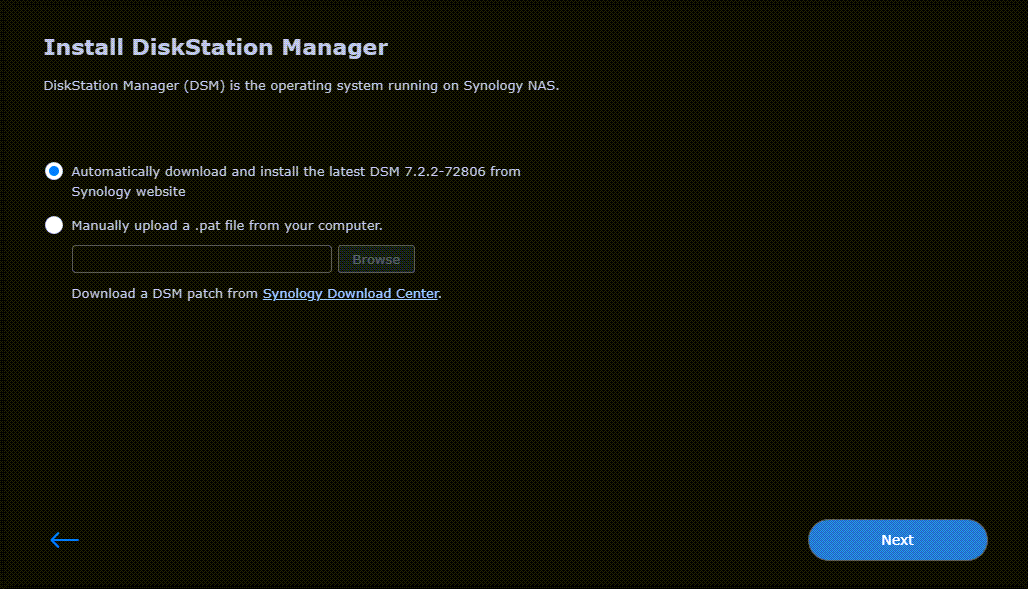
So I clicked the Install button and began the process of setting up my device. The first screen is the installation of Diskstation Manager, where you can select from two options -
- Download the latest release from the Synology website
- Upload an update PAT file - manual update
So, I chose the automatic option to install the latest DSM 7.2 release on my new NAS. I clicked the next button to proceed. It asks you to confirm, then begins the installation and reboot process -
It took approximately 15 minutes to install the DSM software and reboot the unit. Once it came back up, the “Welcome to DSM 7.2” screen was displayed, where you click the Start button to begin the rest of the device setup.

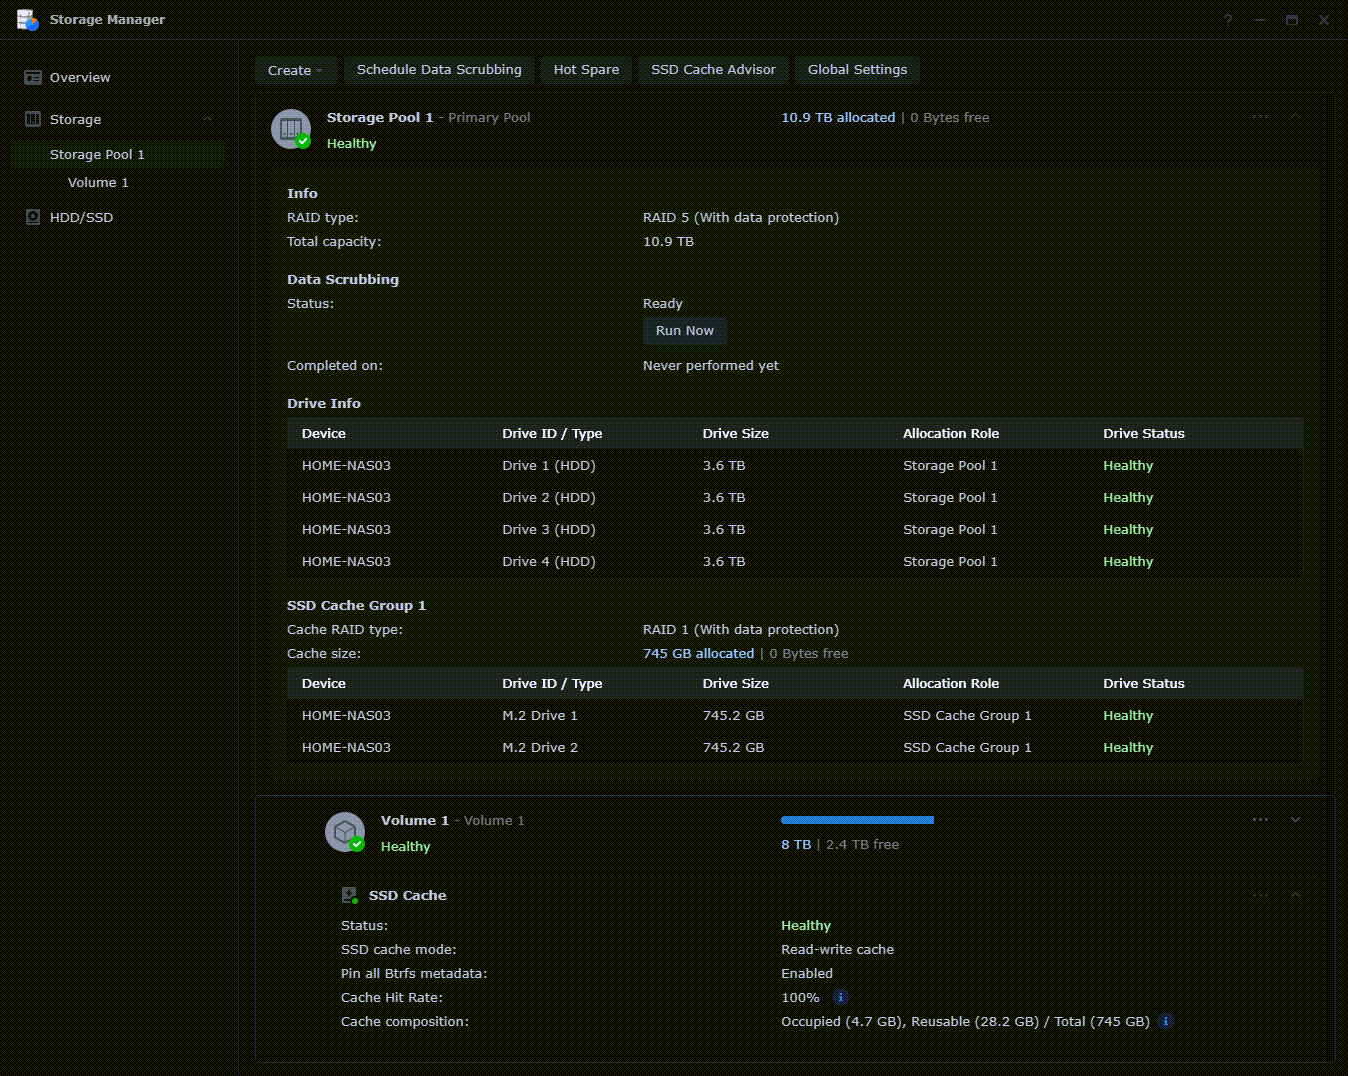
I then proceeded to create a Storage Pool from my four 4TB drives in a RAID 5 configuration, which gave me a total of 10.9TB of usable capacity. This also creates a new Volume for you as well. Next, a RAID 1 for Caching was created using the installed 2 x 800GB NVMe SSD drives. The whole setup looks like this now -
Once I had my storage set up it was time to -
- Add my hosts for the WWNs to allow iSCSI LUN access
- Create 1 LUN of 8TB and map to the Synology iSCSI Host - this grants access to all my other hosts and is a best practice for mapping by Synology versus host mappings
- Add the 1 LUN to VMware and create VMFS volumes
- Update the Synology Storage Console VM to the latest release, 1.1.4-0110
I was now ready to begin the migration process of some of my VMs from the DS923+ to the DS925+. The new NAS will be used for some of my VMware workload via iSCSI, and I will be doing some comparisons to the DS923+ for performance, etc.
For those who might be asking what the Synology Storage Console is, it is a VM that allows for the integration and optimization of your Synology volumes provisioned in VMware, and manages the volumes from within the vCenter Web UI to expand. More information can be found here - https://kb.synology.com/en-global/DSM/help/StorageConsoleforVMware/storageconsoleforvmware?version=7
That now completes my initial setup of the new DS925+. It’s time to get it up and running and put the unit through its paces. I will be writing more blogs on this unit as I work with it more, including some comparisons to the DS923+, which has been rock-solid for me.
I hope you found this article useful, and look for more on the Synology DS925+ in the future. Until then, happy blogging!