I have been using Synology NAS devices for the past two years in my homelab with VMware vSphere 8.0U2, vSAN, Intel Optane, Veeam Backup & Replication, Backup Eagle, Runecast and a host of other things. I have my newest DS923+ set up as my primary storage for my VMware environment and my older DS920+ is my backup NAS as well as Replication partner.
One thing that comes with the Synology DSM 7.2 upgrade (OS) is the ability to set up snapshots on a schedule, including Immutability. With Ransomware on the rise protecting your systems with backups alone is starting to not be sufficient enough. Enter the Immutable storage snapshots with replication on the Synology NAS devices.
In order to configure storage snapshots with Immutability you first need to create a LUN within the SAN Manager application on the web UI. Launch the web UI and log in, from the main screen open SAN Manager and use the Create button to begin the process to create a new LUN.
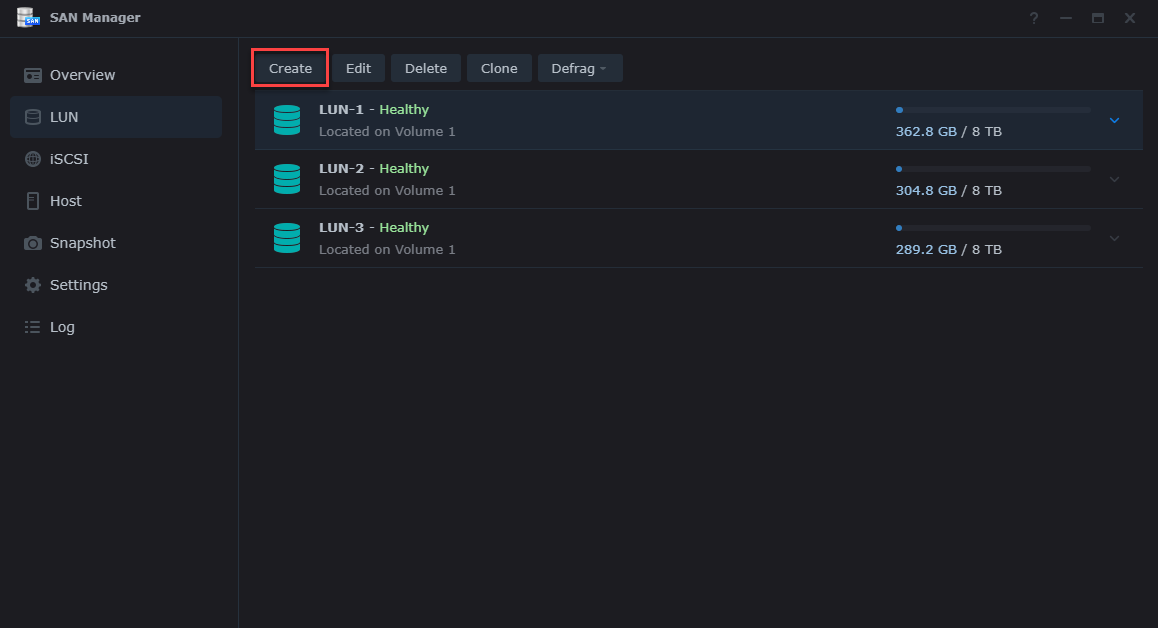
***NOTE: When creeating a LUN for snapshots you need to select Thin Provisioned as the Thick Provisioned option does not allow snapshots.***
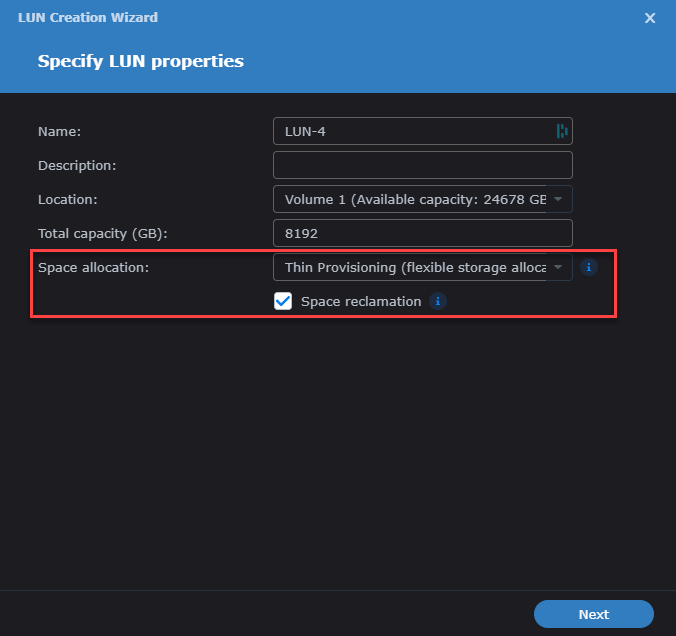
Here is the new LUN Creation Wizard with all the options selected -
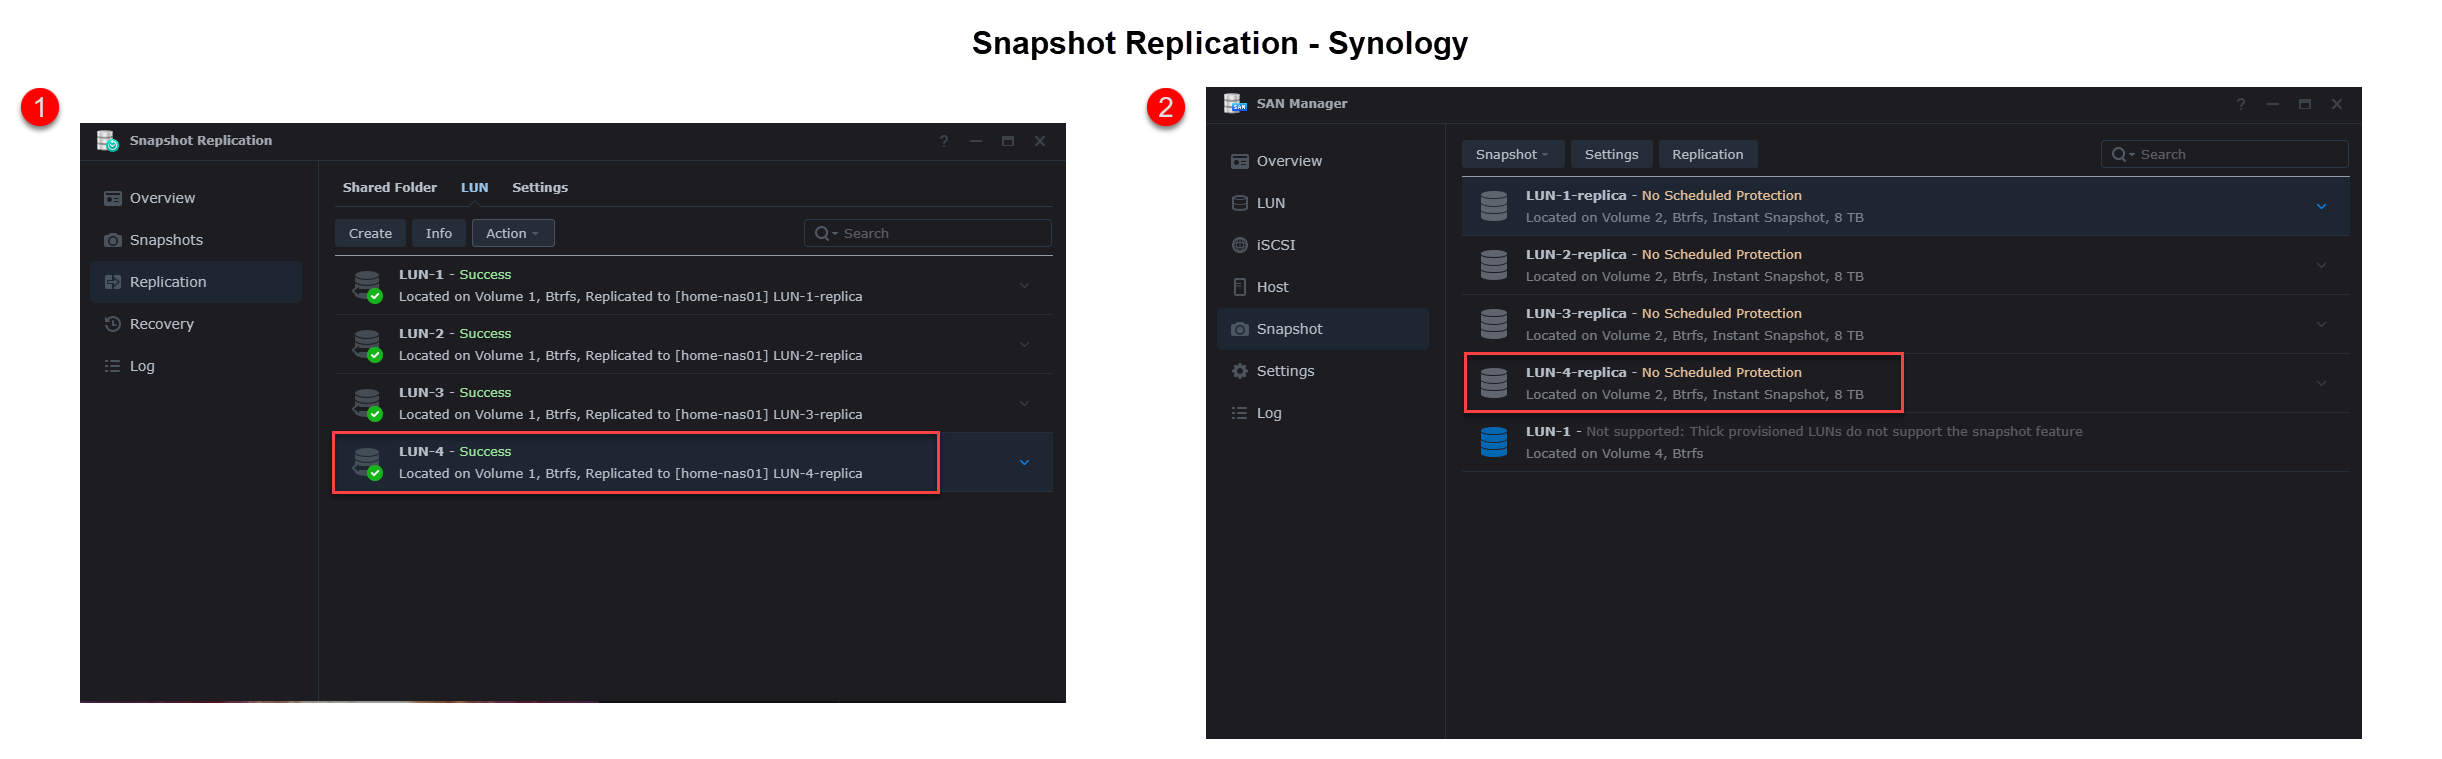
Once the new LUN is created we will now set up snapshots with Immutability and replicate them to my secondary Synology NAS. You will again use the SAN Manager for this process, but select the Snapshot option on the left side menu. This will show the newly created LUN and how it is not scheduled for snapshots - " No Scheduled Protection". We will use both the Settings and Replication buttons on this screen to set things up.
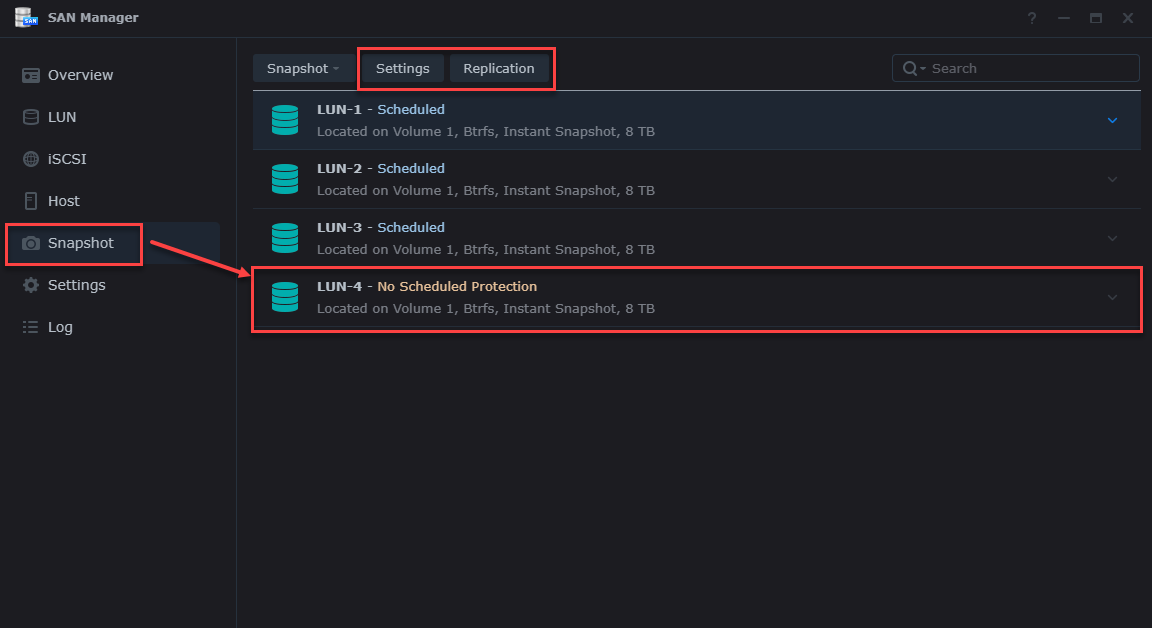
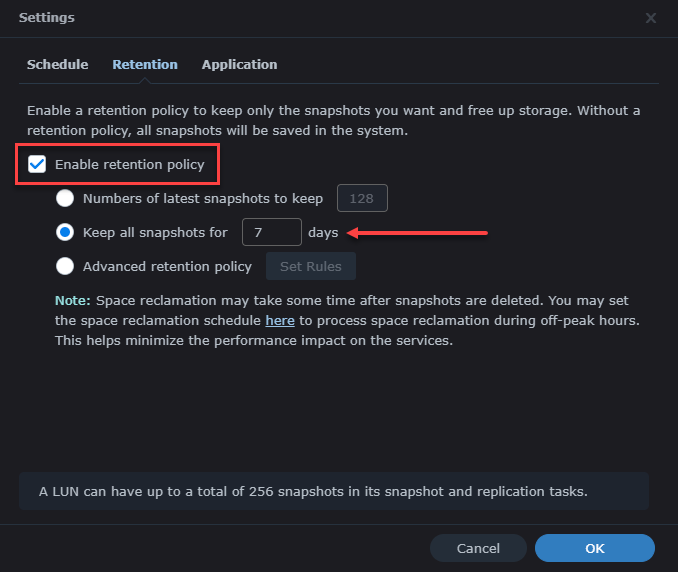
Once you click on you new LUN, in my case LUN-4 it will highlight it and then you click the Settings button at the top of the window in order to configure snapshot scheduling. You will select the following things -
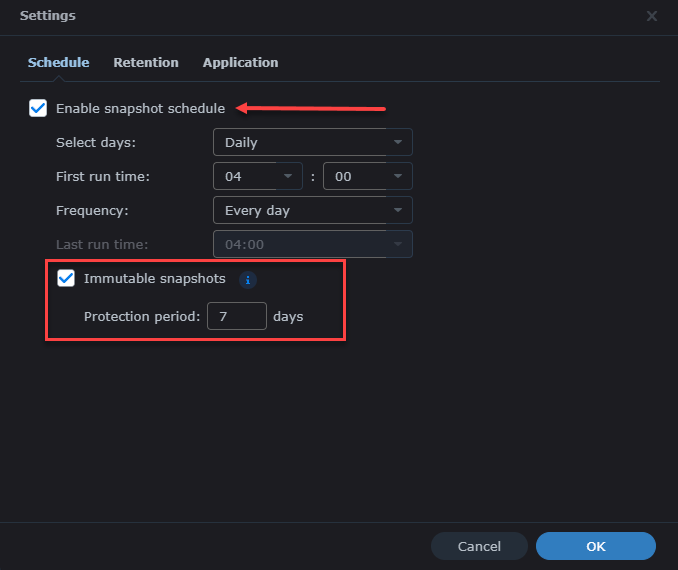
- Schedule - how you want the snapshots to be taken and what time
- Immutability - this is the check box to set to make the snapshots of your LUNs immutable - it is recommended 7 to 14 days
- Retention - this is where you set up the retention period for your snapshots - how long and how many you want to keep
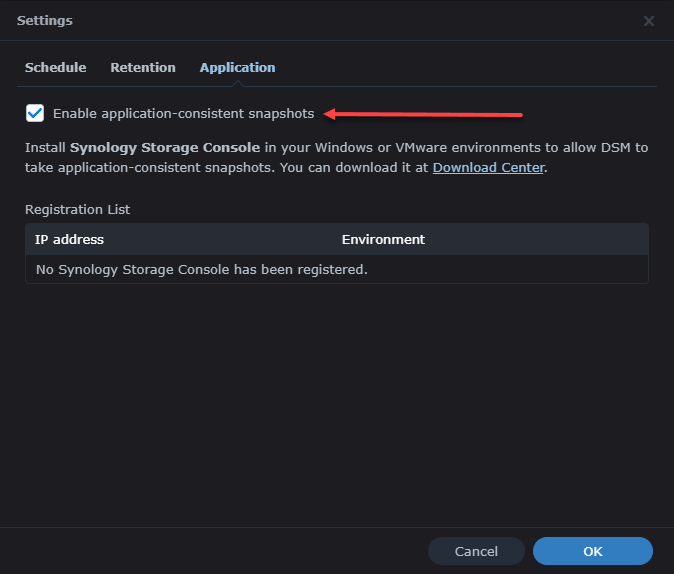
- Application - this allows application consistent snapshots but requires the Synology Storage Console within your VMware environment
After you have set all the required details for your snapshots you click the OK button at the bottom of the Settings dialog to apply your new schedule, retention and application settings. We have now set up a new LUN with snapshots, which includes Immutability as well. Now let’s take a look at how we configure Replication to a partner Synology NAS using once again the SAN Manager and the Replication button.
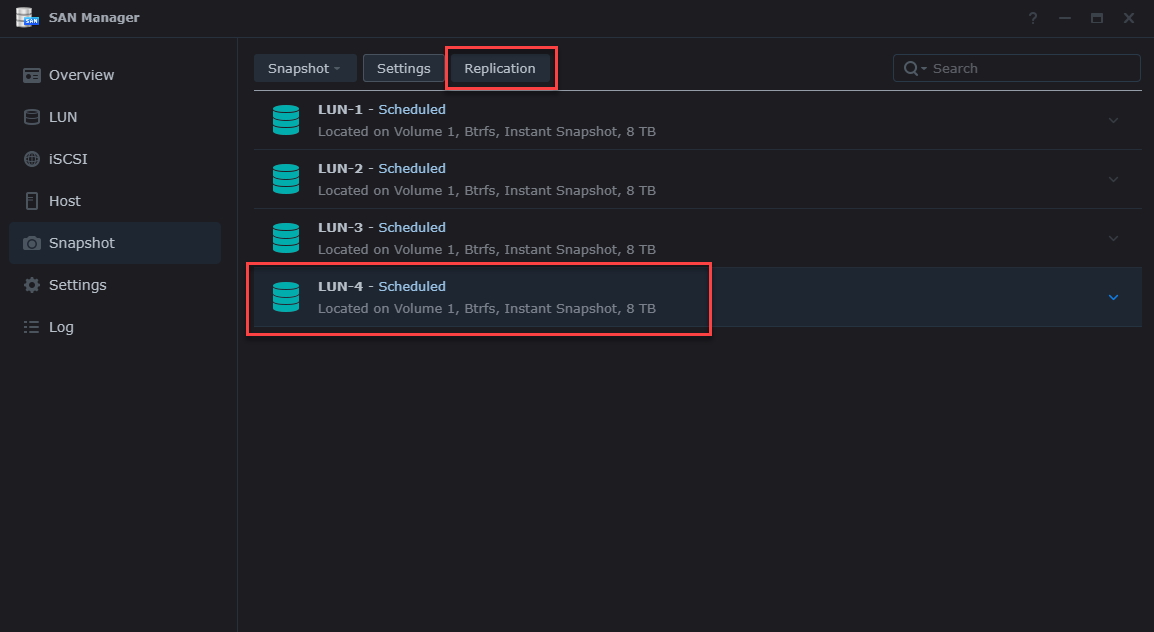
Click again on your new LUN highlighting it and then click the Replication button, which opens the Replication dialog where you will use the Create button to set up a new replication to your target Synology for the new LUN.
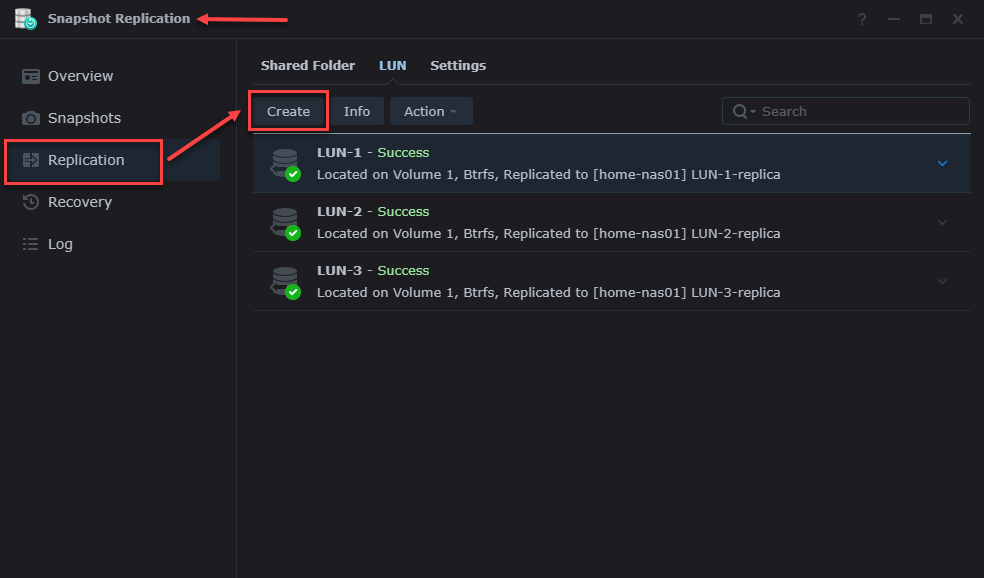
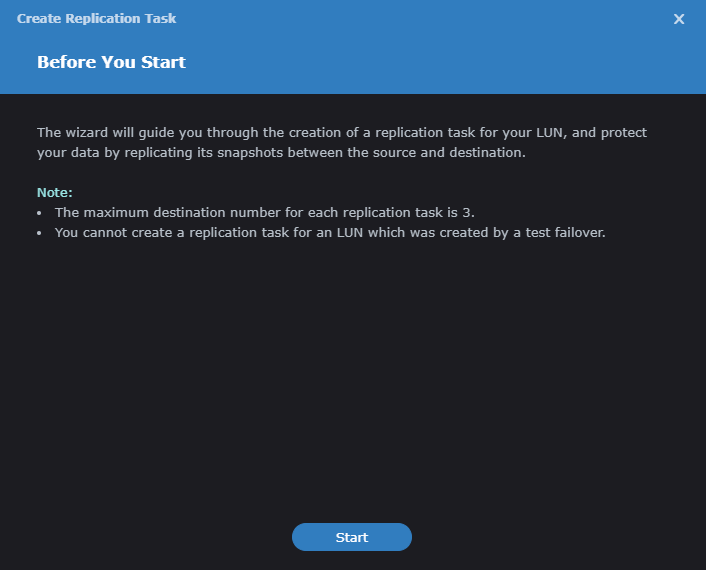
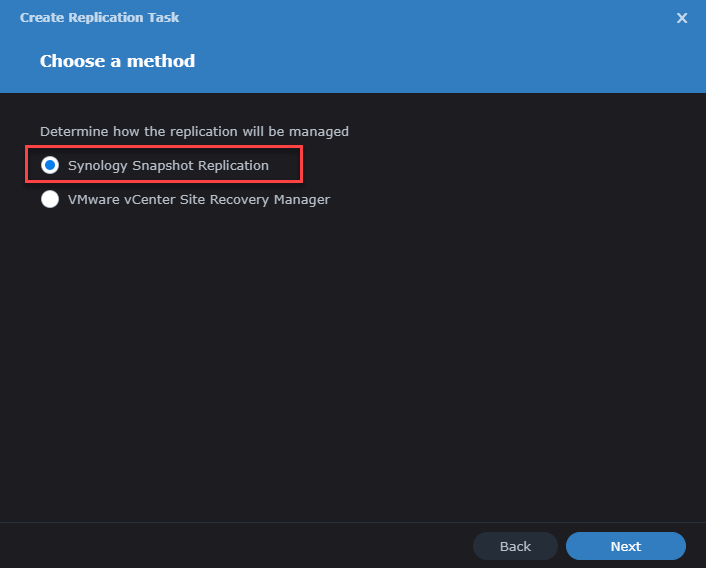
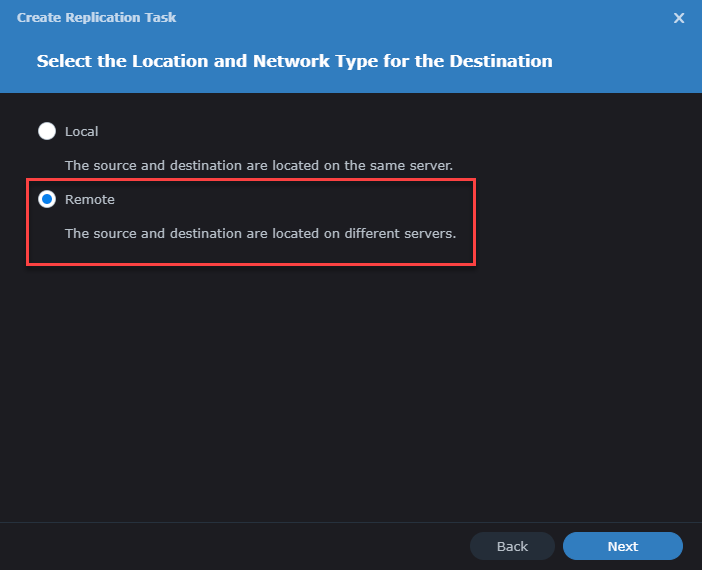
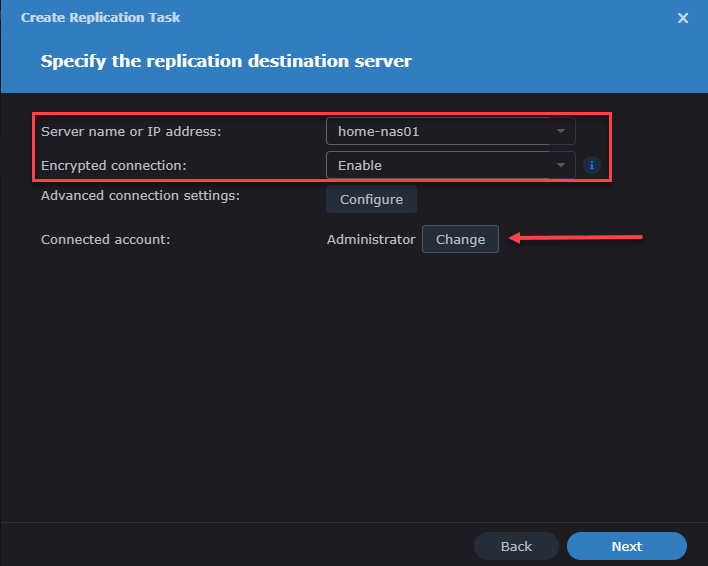
So once you click the create button this will begin the process of creating the Replication for your new LUN -
- Start screen
- Replication Method - can use VMware Site Recovery Manager as well as Synology
- Destination location
- Destination Server with credentials and Encryption
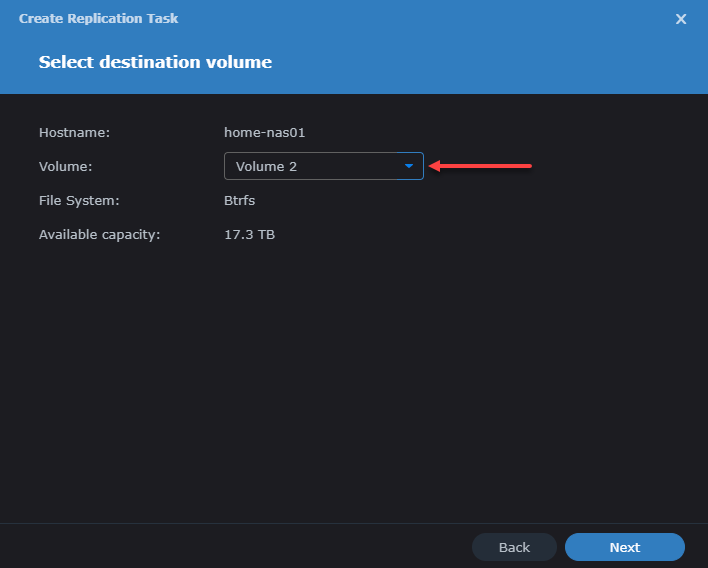
- Destination volume on replication partner
- LUN to replicate
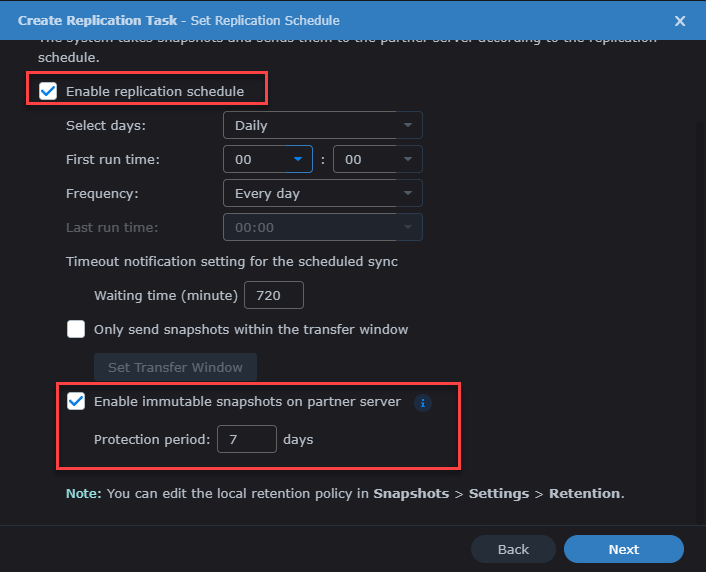
- Destination Schedule - includes turning on Immutability for your replicated LUN which enables double protection
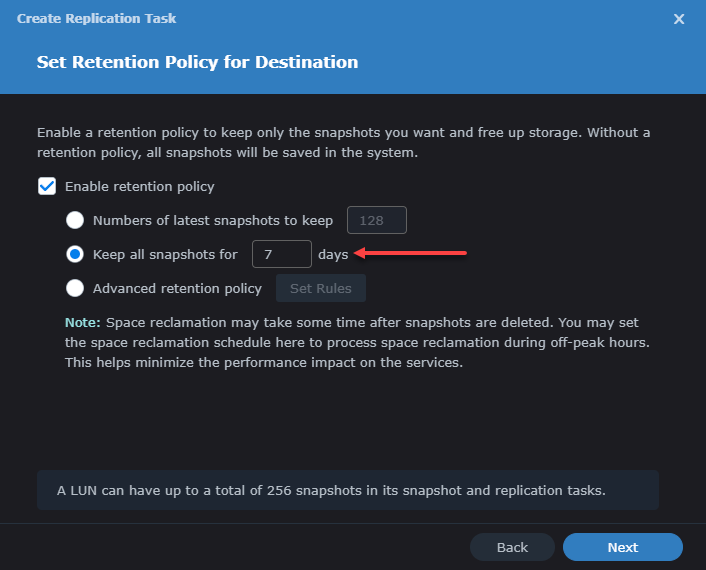
- Destination Retention - typically I set the same as the snapshot retention
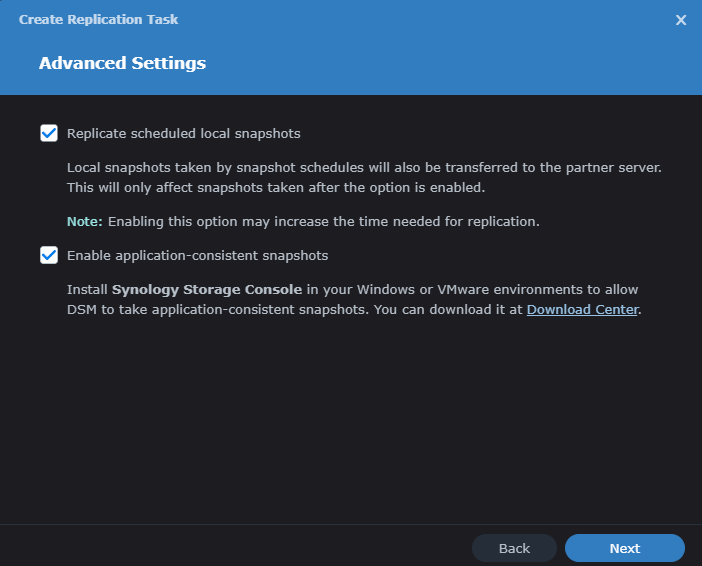
- Advanced Settings
- Final confirmation dialog - review all settings chosen

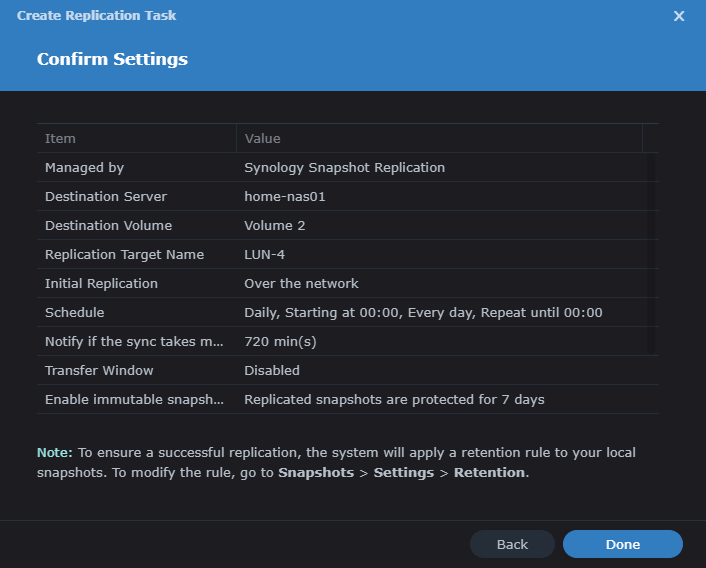
After you click Done on the final confirmation settings dialog this will then set up and begin the replication process for you new LUN(s). Mine did not take long as there is currently nothing on it as I created a new one specifically for this blog. Once the replication completes you can then check both the source and destination Synology devices to see the newly created LUN with replication completed.
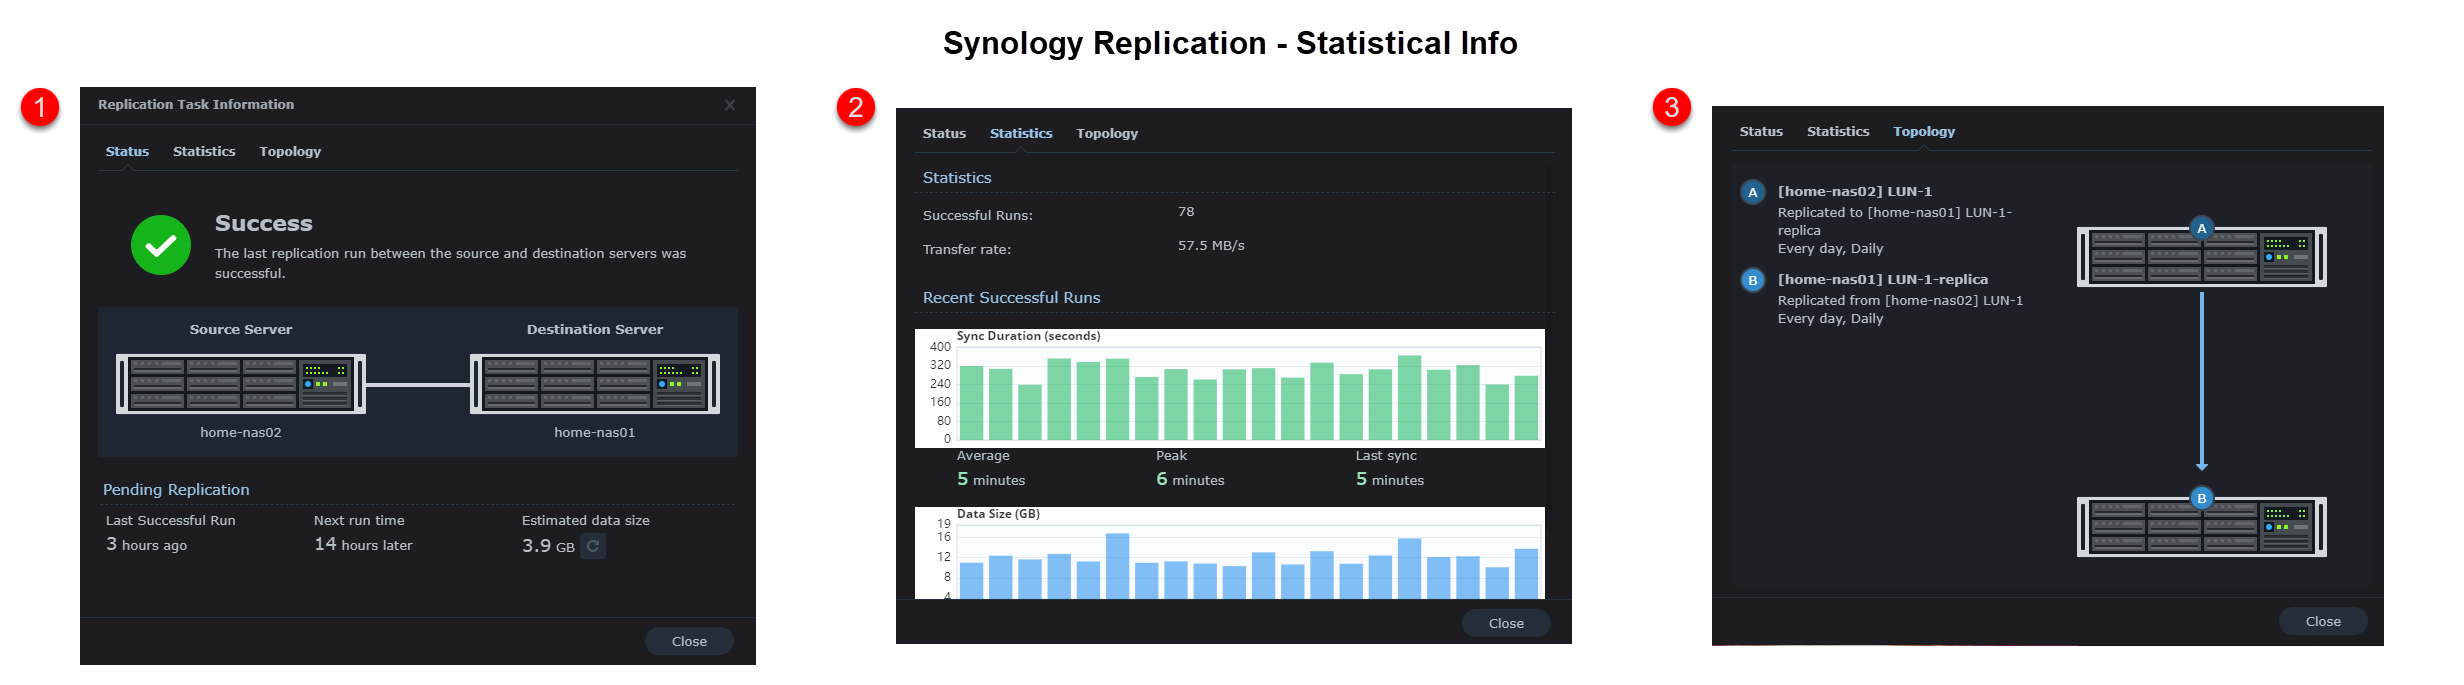
Another really great feature with the Synology NAS lineup is after you set up your replication, you can select a LUN from your list and click the Info button to show you some really nice statistics -
- Status - the status of your replication
- Statistics - number of runs, speed of transfer, duration, and size
- Topology - replication topology between Synology NAS devices with some extra details
And that folks is how you configure a new LUN on your Synology NAS to have Immutability for both Snapshots and Replication. This adds an extra layer of protection against Ransomware on top of your backups which you should also be doing!
I hope you found this article useful and look for more on the Synology NAS devices and features in the future. Until then, happy blogging!